 **UPDATE: VS19e monitor repair instructions and pics now available: VS19E
The other day, I rolled out of bed in the morning and after a cup of
Gevalia’s finest, I sat down at my computer to check the weather. To
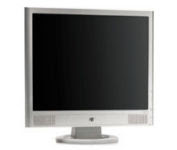
my dismay, upon clicking the power button on my HP vs19d LCD monitor, nothing happened. The blue LED would light up for a few seconds, I would hear a high pitched squeal from inside the monitor, and then nothing. This process would repeat itself until I eventually unplugged the monitor. I later called HP tech support to find that the monitor would have to be replaced. Good thing I bought that expensive three year extension warranty, right? Well, turns out that my warranty only covered my desktop and didn’t extend to the monitor. Excellent.
It seemed like I had one of two options. I could either attempt to fix the monitor myself, or buy a new one. I needed to access my computer to get some files for work, and the HP LCD was the only monitor I had. So, making my decision, I visited NewEgg from work and bought a 19″ WS Acer for a great price.
But I still wasn’t happy that my monitor was only two years old and on its way to the dump. So I decided to crack it open and have a look around. If you’re having a similar problem, follow along, because now my monitor works fine.
To fix yours up, you’ll need:
A phillips head and flathead screwdriver
Some replacement caps (I needed 3x 1000 microF caps rated at 10V or above)
A soldering iron
Solder
Desoldering tool or braid
Ok, first, we need to get the back stand off. Remove the two visible screws, and then pop the plate off the top of the stand to gain access to the third screw.Now slide the base out from the back of the monitor. Whenever the monitor is laying face down, it’s good practice to lay it on an old clean cotton tshirt or something to keep it from getting scratched up. Now we need to pry the front plate off from the rest of the monitor. Using a flathead screwdriver, gently insert the tip into the crack along the side of the monitor and pry until you hear one of the snaps come loose. After the first one, it gets easier. Continue in this fashion to completley remove the front panel.
Once you’ve done this, gently remove the LCD screen and the PCB that holds the buttons from the plastic case. The LCD assembly will still be attached to the plastic by the speaker cords, so it obviously can’t be completley removed. Once you have them separated, turn the LCD over and you should see this:
The larger metal case on the right holds the power supply, while the smaller case on the left holds some of the display circuitry. Gently peel back the metal tape and unscrew the two screws that hold the metal case down. Carefully fold the metal case to the right to expose the power board:
So I could more easily move the board around, I also removed the two screws that held in the power cord socket:
Now it’s time to investigate where the problem lies. I checked over all the capacitors and found these three in one of the corners of the board. Two of them had dried electrolytic fluid on top, indicating that they were blown. The third one (on the left) was bulged out on the top, which meant it had probably blown too, but the ‘X’ vent on top hadn’t cracked open. So, these were the caps I needed to replace. Make sure you read the side of them to see what size (Farads) you need to get.
I propped the board up in the air (it was pretty tricky to do this part) and used a nice soldering iron to melt the solder that attached these caps while I gently pulled on them. Eventually, I got all three loose.
Using the new caps I bought from Radio Shack for $1.59 each…I then proceeded to solder the new caps into place. BE SURE YOU GET POLARITY RIGHT. On mine, the black half circle that was printed on the PCB indicated the negative terminal. Pay attention to which way the busted caps are oriented and make sure you orient the new ones in the same fashion.
Now we have the new caps soldered and in place, so put all the screws back into place, replace the metal box and the metal tape, gently set the LCD back into the plastic case (be sure to stick the buttons PCB back where it belongs), snap on the front cover and reattach the base. If you’ve done everything correctly, and the caps were the problem, then your LCD monitor should be good as new! Funny that little things like capacitors can cause such a headache.
If this tutorial saved you lots of money or time, a small donation would be enormously appreciated. This little stream of income allows me to dedicate more time to helping others with their problems. Thanks for stopping by!

Anonymous
Anonymous
Anonymous
MD Schmidt
Anonymous
pcollenFL
pcollenFL
Ythill
Anonymous
MD Schmidt
Getoninja
Anonymous
peter
Anonymous
Ed
MD Schmidt
Evan
Digital Neptune
Anonymous
Ralph Willey
Dan
Anonymous
MD Schmidt
James
MD Schmidt
Anonymous
MD Schmidt
Anonymous
Anonymous
jeffmcc
Anonymous
Anonymous
Anonymous
Carlos
westwayz recordz
Pingback: HPvs19e Monitor Fix | Schmidt Creative Design Studio
Younggunnaz
Tracy Tierney
MD Schmidt
Karen S.
Scott
Ryan
Bronzen
Bronzen
Barney O'Connor
Michael
Tariessia
MD Schmidt
Tariessia
Bob Widmar
MD Schmidt
Tariessia
Fernando
MD Schmidt
Fernando
John Williams
Ray
Pingback: » HPvs19e Monitor Fix
Pingback: HPvs19e Monitor Fix | CastleSeven